Sunday, February 24, 2013

Living Room Update

I really need to blog more frequently, ideally this should have been updated in real-time and thus broken up into a few shorter posts.  Warning: this is going to be long.

The living room has been my biggest struggle since we moved in - it was a definite hodge-podge and I was really struggling with the color palette and figuring out how to frugally pull it together   I think I've finally found some fabrics, trim and a rug to move it in the right direction and still work with what I already have.  For better or worse, I do like things to be light, feminine and mostly monochromatic with a pop of another color here and there.

As everyone knows, it really does take time and patience to transform a room and looking at this picture from one year ago reminds me we have made more progress than I've recently thought.

The room looked like this until a week or two ago.  Fine, but just not my vision.

And currently - view from the foyer:

View from the french doors in kitchen / den:

View towards the kitchen:

Jean's (my MIL) good friend Jackie works at Summer Classics here in Raleigh and they located some market sample chairs (86% off!!!!) for me during a recent sale.  Being furniture market samples, they didn't have matching leg finishes -- one is dark wood and the other cream -- and they didn't have matching fabric -- one had cream damask (on the left) and the other a very grandma floral slipcover (since stripped off!), but they had a lot going for them.  I love that they are on brass casters.  I love the shape.  I love that they are actually quite comfortable and substantial.  Most of all, I love the quality of the chairs for such a bargain price.  I want to recover them in cream / off-white velvet (but again, that is going to take time, patience and will power to save up).

Here is what I'm going for -- minus the piping:

Finding these chairs was the motivation I needed to save up and turn this room into one that I love.  Josh, a typical man, recently asked me if we could mount a TV over the fireplace.  Sorry honey, that is not in the cards.  My priorities: rug, lighten up the drapes, find fun fabric for pillows.  Longer term: mirror over the fireplace, decide on art (do a new large abstract?), find secretary or something with height to left of french doors.

Rug
Sticking with the clean look of a sisal in the living room.  I found the sisal at Eatman's and it should be finished any day!

Pillow Fabric
While selecting my rug at Eatman's I went over and browsed in their fabric section.  Lots of gorgeous "to-the-the-trade" lines.  Of course I fell in love with a Jane Churchill velvet dot fabric, only to find it was actually discontinued in the green colorway.  Luckily the worldwide web found me a meter in the UK.  It is on its way across the pond to me now.  I'll have two pillows made for the cream velvet chairs.

I also found a Cowtan & Tout fabric for pillows on the couch.  I know they are similar, but I couldn't resist.

Lighten up drapes
The drapes in my living room are the ones from my dining room in our Edenton St house.  I love them, but they have also been part of the reason I've been confused about the direction of this room.  They come off darker than I'd pick out for the room and the trim colors were taking me in a different direction.  However, I don't want to scrap them completely because they are really well made and I didn't want to spend the money to start over.  For $50 I'm going to change the trim and hopefully that will change their overall look.  The ribbon is from Mill Outlet in Raleigh and had to be ordered, so I'll update you in a few weeks when it arrives. (Josh informed me this evening that it does not go with the fabric...hopefully he is wrong)

I'm impressed if you are still scrolling down -- that was quite long-winded.

Have a great week!

XO,
Whit

Sunday, February 17, 2013

Mr. & Mrs. Bean!

We spent the weekend in Richmond, VA celebrating La & Bean!  It was a wonderful weekend and I'm already in withdrawal and sad it's come to a close.  Of course, little La was stunning - she looked like a perfect doll.  

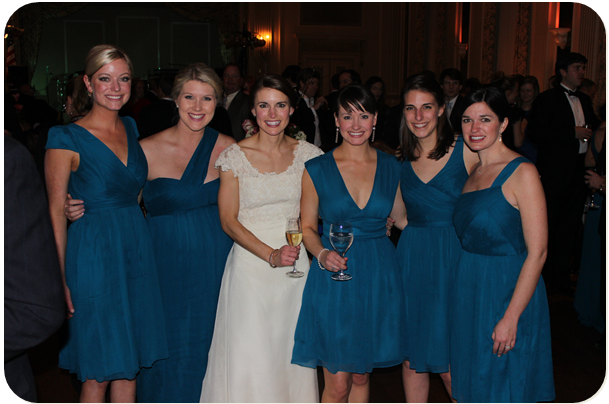
Bridesmaids minus Louise & Caroline
La and her now mother-in-law, Grace
Two of the Camp Thunderbird ladies, Haden & Hunter
La wore her mom's gorgeous dress and veil
UNC bridesmaids
Camp Thunderbird bridesmaids
Loved her grandmother's fur!
Beautiful sisters - almost time to walk down the aisle
with my parents
Rachel and Todd with her parents
Cameron Court reunited!
Josh with the Taylors
Dr. Anderson and his girls getting into Proud Mary
The Beans enjoyed their reception as much as I've ever seen any bride and groom!
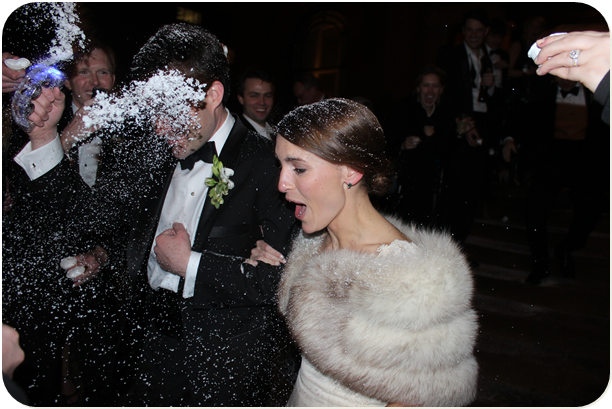
We threw fake snow when they departed -- how fun!
Congratulations La & Bean!  We love you both and can't wait for you to return to Raleigh as a married couple!

XO,
Whit

Thursday, February 7, 2013

Master Bedroom Cornices & Panels Project

This project is slow -- and for once it isn't all my fault!  I had 4 panels that I ordered for our old den that I used in this project, but am waiting on 4 more to arrive to complete it.

However, I'm getting impatient and wanted to show the progress of this semi-DIY project.

Here is the before and a little tour of the room.
The bedding still needs some help.  It is a bit of a mix of pre-marriage bedding from both our beds.  The skirted table on my side needs to go -- on the hunt for a small chest.
The desk was recently loaned to us by Bailey since she didn't have space in Boston (lucky me!).  I need to get a vanity stool / chair and hang something over it.  I'm thinking of maybe a little lucite chair to add something a bit more modern to the room.
This bench and plates vignette is probably my favorite place in the house.


The man who did the cabinets during our renovation was nice enough to agree to use left over materials to make me 3 cornice boards.  Maybe your husband is handier than mine and can help?  Otherwise, you could try thick foam board, but it may not give you quite as sturdy or smooth of base.

I bought a few yards of batting from Mill Outlet (so cheap!).

I then laid the cornice on the batting and cut out enough to staple onto the cornice board.  Pull tightly!  It can be helpful to have an extra set of hands, but I did it solo this time.  

I then went around and hammered the staples in because sometime I didn't apply quite enough pressure with the staple gun.  


Someone felt the need to keep laying on my fabric...

I then ironed the pre-made rod pocket panels.  I used one panel to cover two cornices.  I'd recommend just buying fabric by the yard for this part, but unfortunately that wasn't an option for me.  I then traced around on the fabric and stabled onto the board covered in batting.  I was careful to keep looking on the front side to make sure it was smooth.  

I was careful to keep looking on the front side to make sure it was smooth.  I'm not going to lie - the corners are a bit hard and mine are not perfect.  I am ok with that though.

I ordered quite a lot of trim samples from MJ Trim.  Round one was a lot of velvets because I was going to try to do my own Greek key-ish pattern on them.  None were the right blue.  Round two was Greek key flat ribbons.  Still not loving the colors choices with my existing fabrics.

I was about to go with ivory / white velvet, but then found a great blue & cream flat ribbon trim at Printer's Alley.  It was the perfect colors!

I pinned it in a rectangle shape on the cornice border.  I rounded the corners without cutting.

Prior to gluing with fabric glue I placed it on the window to see if I was digging the pattern.

Then I glued away.  This glue was awesome - it didn't make the ribbon pucker at all and did not show through like a very watery glue like super glue would.  I applied two lines and tried to get as close to the outside of each ribbon so it will stay nice and flat.

Then I ironed the panels really well -- they were quite wrinkled after almost a full year folded in plastic.  First time I've ironed anything in probably years - it actually was kind of relaxing.  Maybe I'll start being a sweet wife and helping Josh out.

I then laid the ribbon about 1.5-2" from the edge of the panel and glued down.

Then I hung with a cheap rod from Mill Outlet.  Be careful not to get one that sticks out too far (based on depth of cornice).

I used my drill and put D-rings on the back of my cornices.  I then used two 75 lb. hangers to ensure they were going to be secured into the wall (especially since my cheapo rod can't support the cornice!).

BEFORE:


It really was not hard at all, but this was semi-DIY.  Wish I owned a table saw (is that even the right kind for this project, Dad?) and knew how to sew (like Mom)!

Will report back when the other panels arrive and it's complete.

XO,
Whit